How to Install Toilet Flange Before Flooring: 11 Semple Ways!
When it comes to bathroom construction or renovation, certain essential steps must be followed to ensure a watertight and stable toilet installation. Before you lay down any flooring, make sure to install the toilet flange.
The toilet flange connects the toilet to the sewer pipe and keeps it secure on the floor. Getting this step right is paramount to prevent leaks and structural issues in the long run.
This guide will tell you how to install a toilet flange before flooring. We’ll go through each step, from preparing to checking stability. Whether you love doing projects yourself or own a home, this guide will help you finish the job well.
How to Install Toilet Flange Before Flooring: 11 Steps!
Installing a toilet flange before flooring is an important step in the construction or renovation of a bathroom. The toilet flange is a pipe fitting that connects the toilet to the sewer pipe and anchors it to the floor. Here are the steps to install a toilet flange before flooring:
Materials and Tools You’ll Need:
- Toilet flange
- Wax ring
- PVC cement (if using a PVC flange)
- Screws
- Screwdriver or drill
- Pipe wrench
- Hacksaw (if needed to trim pipes)
- Measuring tape
- Pencil
- Level
- Toilet
Step-by-Step Instructions:
01. Prepare the Area:
Make sure the floor is clean and free of any debris. If you’re installing a new subfloor or repairing the existing one, ensure it is level and properly secured.
02. Locate the Drain Pipe:
Identify the location of the drain pipe where the toilet will be installed. It should be centered and positioned properly for the toilet’s rough-in size (usually 12 inches from the wall).
03. Measure and Mark:
Measure the distance from the center of the drain pipe to the finished wall, usually 12 inches. Mark this measurement on the floor using a pencil.
04. Cut the Drain Pipe (if necessary):
If the drain pipe is too high above the floor, you may need to trim it to the correct height. Use a hacksaw to carefully cut it to the desired height.
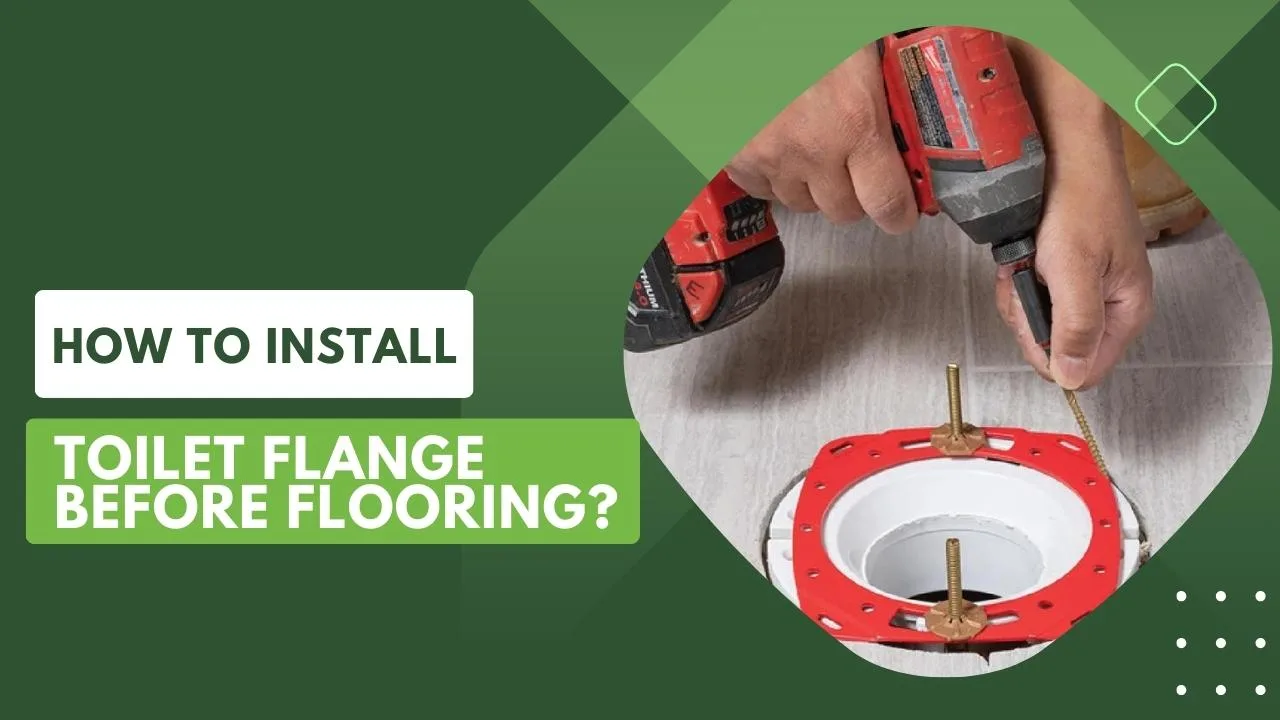
05. Install the Flange:
Place the toilet flange over the drain pipe so that it aligns with your measurement mark. If you are using a PVC flange, apply PVC cement to the inside of the flange and the outside of the drain pipe, then press the flange onto the pipe. Make sure it is seated securely.
If you are using a metal flange, secure it to the floor using screws. Make sure it is level and centered over the drain pipe.
06. Attach the Flange to the Floor:
Use screws to secure the flange to the subfloor or the floor structure. Make sure it is firmly anchored to prevent movement.
07. Install the Wax Ring:
Place a wax ring (or wax gasket) over the flange. The wax ring provides a watertight seal between the toilet and the flange.
08. Install the Toilet:
Carefully lower the toilet bowl onto the wax ring, aligning the mounting holes in the base of the toilet with the bolts on the flange. Gently press down on the toilet to compress the wax ring and create a seal. Secure the toilet to the flange by tightening nuts onto the flange bolts. Be careful not to over-tighten and crack the toilet.
09. Connect the Water Supply:
Connect the water supply line to the toilet tank and turn on the water to fill the tank.
10. Test for Leaks:
Flush the toilet and check for any leaks around the base. If you see any leaks, tighten the nuts on the flange bolts a bit more.
11. Install the Flooring:
Once the toilet is securely in place and there are no leaks, you can proceed to install the flooring around the toilet.
By following these steps, you can install a toilet flange before flooring and ensure that it is properly secured and sealed for your toilet installation.
Also Read:9 Actionable Tips: What to Do If Toilet Flange is Too Low?
Best Types of Toilet Flange in 2024!
Discover the top toilet flange types for 2024! Find the perfect fit for your bathroom with our comprehensive guide and expert recommendations.
| Types of Toilet Flange | Best Uses For | Ratings | Prices | Plumber Feedback |
|---|---|---|---|---|
| PVC Toilet Flange | Common residential toilets | 4.5/5 | $5 – $10 | Easy to work with. |
| ABS Toilet Flange | Common residential toilets | 4.4/5 | $6 – $12 | Durable and cost-effective. |
| Cast Iron Toilet Flange | Older, heavy toilets | 4.7/5 | $20 – $40 | Extremely durable. |
| Copper Toilet Flange | High-end bathrooms | 4.9/5 | $15 – $30 | Aesthetic and corrosion-resistant. |
| Brass Toilet Flange | High-end bathrooms | 4.8/5 | $20 – $35 | Elegant appearance. |
| Stainless Steel Toilet Flange | Commercial & industrial use | 4.6/5 | $15 – $25 | Resistant to corrosion. |
| Aluminum Toilet Flange | Lightweight applications | 4.3/5 | $8 – $15 | Lightweight and affordable. |
Please note that the ratings, prices, and plumber feedback are approximate values and can vary based on location and specific product brands. Make sure to verify this information when making a decision about which toilet flange to use for your specific needs.
Also Read: Flush or Not: The Truth About Toilet Flange Positioning
How do you install a toilet with a flange below the floor level?
Installing a toilet with a flange below the floor level can be a bit more challenging, but it’s still possible. This situation typically arises when you’re replacing a toilet, and the new flange is not flush with the finished floor due to a thicker flooring material or other factors. Here’s how to install a toilet with a flange below the floor level:
Materials and Tools You’ll Need:
- Toilet flange extension kit (if needed)
- Wax ring with horn (extra-thick wax ring)
- Toilet
- Adjustable wrench
- Screwdriver or drill
- Wax paper or plastic wrap
- Shims (optional)
- Caulk (optional)
Step-by-Step Instructions:
- Inspect the Existing Flange
- Measure the gap between the flange and the floor.
- Use a flange extension kit if the gap is significant.
- Place an extra-thick wax ring on the flange.
- Lower the toilet onto the wax ring, aligning the holes.
- Secure the toilet to the flange with nuts.
- Check for stability and leaks.
- Optionally, caulk around the base for a finished look.
By following these steps, you can successfully install a toilet with a flange below the floor level, ensuring a secure and watertight connection between the toilet and the sewer pipe.
Also Read: Crucial Answers: Toilet Flange on Concrete or Tile?
Should toilet flange be attached to floor?
Yes, the toilet flange should be securely attached to the floor. The toilet flange connects the toilet to the sewer pipe below. It is very important. The toilet stays stable with this, so it doesn’t move or wobble. This helps avoid leaks and damage.
To prevent sewage gases and wastewater leaks, secure the flange tightly to the floor. To do this, flanges are usually attached to the floor with screws or other fasteners.
Installing this secure attachment is crucial for a toilet’s long-term functionality and durability.
How is a toilet flange attached to the floor?
A toilet flange is typically attached to the floor in several steps to ensure a secure and stable connection. First, place the flange over the drain pipe. Make sure it aligns with the toilet’s location, is level, and centered.
Then, screws or fasteners are used to secure the flange to the subfloor or the floor structure. These screws go through holes in the flange and into the floor. The flange should be snugly fitted and anchored, preventing any movement.
After securing the flange, put a wax ring on top to seal the toilet and flange. Next, the toilet bowl is placed on top of the wax ring. Then, tighten the nuts onto the flange bolts to secure the toilet.
This method makes sure the toilet is securely attached to the floor. It also keeps the toilet from leaking and provides stability when you use it. Toilet system function and lifespan depend on correctly installing the toilet flange.
How do you attach a toilet flange to a tile floor?
Materials and Tools You’ll Need:
- Toilet flange with a long tailpiece
- Wax ring
- Adjustable wrench
- Screws suitable for tile (e.g., masonry screws)
- Screwdriver or drill
- Tile drill bit
- Plastic anchors (if needed)
- Caulk (optional)
Step-by-Step Instructions:
- Prepare the Tile Surface: Ensure that the tile floor is clean and free of debris.
- Position the Flange: Place the toilet flange over the drain pipe so that it aligns with the desired toilet location.
- Mark Screw Hole Locations: Mark the locations of the screw holes on the tile using a pencil or a marker.
- Drill Holes in the Tile: Use a tile drill bit to drill holes through the marked locations on the tile.
- Install Plastic Anchors (if needed): If your tile holes are larger than the screws or if the tile is over a wooden subfloor, you may need to insert plastic anchors into the holes to provide extra support for the screws.
- Attach the Flange to the Tile: Position the flange over the drilled holes, ensuring that the tailpiece fits inside the drain pipe.
- Secure the Flange to the Floor Structure: In addition to attaching the flange to the tile, it’s essential to secure it to the floor structure beneath the tile.
- Install the Wax Ring: Place a wax ring with a horn (extra-thick wax ring) onto the flange. The horn should be facing up.
- Set the Toilet: Lower the toilet bowl onto the wax ring, aligning the mounting holes in the base of the toilet with the flange bolts on the flange.
- Secure the Toilet: Place plastic wrap or wax paper over the flange bolts to protect the wax seal, then secure the toilet to the flange by tightening nuts onto the flange bolts.
- Check for Stability: Ensure that the toilet is stable and doesn’t wobble. If necessary, use shims to level it.
- Optional Caulking (for aesthetics): If desired, apply a bead of caulk around the base of the toilet to create a finished look and prevent debris from getting under the toilet.
By following these steps, you can successfully attach a toilet flange to a tile floor, providing a secure and watertight connection for your toilet installation.
Also Read: What’s the Right Toilet Flange Size for Your Bathroom?
FAQ: How to Install Toilet Flange Before Flooring and More:
A1: While I can’t provide diagrams directly, you can find step-by-step illustrations and diagrams for installing a toilet flange before flooring in many plumbing books, online resources, or instructional videos. These visual guides can help you understand the process better.
A2: To install a toilet flange on a concrete floor, you’ll typically need a hammer drill and concrete screws. Drill holes into the concrete, insert plastic anchors or lead anchors if needed, and then secure the flange using appropriate screws. Follow the same steps for wax ring and toilet installation as you would on other types of floors.
A3: To install a PVC toilet flange, you’ll typically need PVC cement. Apply PVC cement to the inside of the flange and the outside of the drain pipe, then press the flange onto the pipe. Make sure it’s seated securely, and follow the standard toilet installation process afterward.
A4: In new construction, you’ll follow these general steps:
1. Determine the correct placement for the flange.
2. Securely attach the flange to the floor or subfloor.
3. Install the appropriate wax ring.
4. Set the toilet in place and secure it to the flange.
5. Check for stability and leaks.
6. Complete the flooring around the toilet.
A5: A toilet flange extender, also known as a flange spacer or riser kit, is a device used when the existing toilet flange is too low or below the floor level. It raises the flange’s height, allowing the toilet to sit at the proper level for a secure installation. This is often necessary when new flooring is added, and the flange needs to be brought level with the finished floor.
Closing Remark:
Properly installing a toilet flange before flooring is a fundamental aspect of creating a functional and leak-free bathroom. This guide has provided you with a comprehensive step-by-step process to ensure that your toilet flange is securely and correctly placed before any flooring material is laid down.
By following these instructions diligently, you can ensure a stable connection between your toilet and the sewer pipe while preventing potential water damage and structural issues in the future.
Whether you’re embarking on a bathroom renovation project or simply looking to enhance your DIY skills, this knowledge empowers you to complete this crucial task with confidence. Remember, a well-installed toilet flange is the foundation for a reliable and trouble-free toilet system.
