Toilet Flange Installation: Before or After Flooring?
Toilet flange should be install before flooring to ensure a secure and level connection. Proper installation of a toilet flange is essential for efficient functioning of the toilet and protecting the floor from damage caused by leaks.
When it comes to installing or renovating a bathroom, one crucial question often arises: Should the toilet flange be install before or after the flooring? The toilet flange, also known as a closet flange, is an essential component that connects the toilet to the sewer pipe and ensures a secure and watertight connection.
The order of installation can have significant implications for the overall functionality, stability, and aesthetics of the bathroom. Therefore, understanding the pros and cons of each approach is crucial for homeowners, contractors, and anyone involved in bathroom construction.
In this article, we will explore the arguments for and against installing the toilet flange before or after flooring, providing you with valuable insights to make an informed decision for your next bathroom project.
Does Toilet Flange go on Top of Finished Floor?
Yes, the toilet flange should be installed on top of the finished floor. The toilet flange is a critical component of a toilet installation as it connects the toilet to the sewer pipe and secures it firmly in place. By positioning it on top of the finished floor, you ensure a proper seal between the toilet and the sewer line. This helps prevent leaks and ensures that waste is efficiently carried away.
Additionally, having the flange at the correct height ensures that the toilet sits level and securely on the floor, providing stability and preventing rocking or wobbling, which could lead to damage or leaks over time. Properly aligning the toilet flange with the finished floor is essential for a successful and trouble-free toilet installation.
Discussing The Pros And Cons Of Installing Toilet Flange Before Flooring
Installing a toilet flange before flooring has its ups and downs. By installing the flange before the flooring, the flange can be located and identified more effortlessly. It also becomes simpler to adjust the height.
There’s a lower risk of damaging the flooring as well. However, inaccuracies in positioning may occur due to shifts in floor height. Sealing difficulties may also arise due to gaps created by leveling compound or thin-set.
Additionally, this method is only practical for new constructions or complete gut renovations. When deciding whether to install a toilet flange before or after flooring, it’s important to weigh the benefits and drawbacks to make the best decision for your particular situation.
The Easy Guide For: Toilet Flange Be Installed Before Or After Flooring
The installation of a toilet flange is a critical step in creating a functional and leak-free toilet connection in your bathroom. However, the question of whether the toilet flange should installe before or after the flooring can often lead to confusion and uncertainty.
This informative guide aims to shed light on this topic by presenting the advantages and disadvantages of each approach. By understanding the implications of both methods, you can make an informed decision that best suits your specific circumstances and ensures a successful bathroom installation or renovation.
1. Installing the Toilet Flange Before Flooring:
Installing a toilet flange before flooring is a common practice to ensure a clean and secure connection between the toilet and the sewer line while maintaining a professional finish. Here are the steps to install a toilet flange before installing flooring:
Materials and Tools Needed:
- Toilet flange
- Wax ring
- Flange bolts
- Adjustable wrench
- Screwdriver
- Measuring tape
- Saw (if necessary)
Install Steps Toilet Flange Before Flooring:
01. Prepare the Area:
Begin by removing the old toilet and cleaning the area where the new flange will be installed. Ensure that the subfloor is level and in good condition.
02. Determine Flange Placement:
Measure the rough-in distance, which is the distance from the wall to the center of the drain pipe. This measurement will help you position the flange correctly. Mark the location on the subfloor.
03. Cut the Waste Pipe (if needed):
If the existing waste pipe is not at the correct height, you may need to cut it down to the appropriate level using a saw. The top of the flange should sit flush with or slightly above the finished floor.
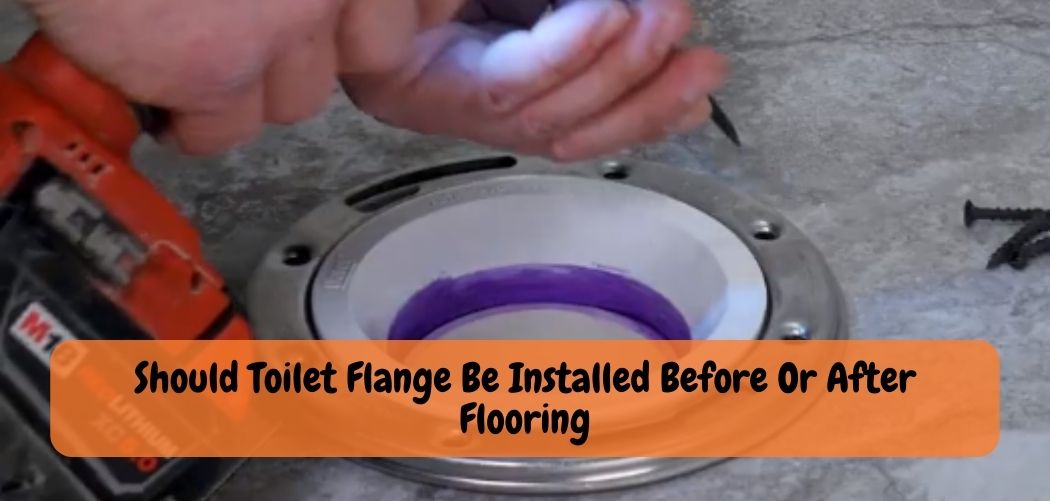
04. Install the Flange:
Place the flange over the waste pipe, ensuring that the slots for the flange bolts are aligned with the toilet’s mounting holes. Secure the flange to the subfloor using screws or bolts, making sure it is level and properly aligned with your reference marks.
05. Seal the Flange:
Apply a generous bead of silicone caulk or plumber’s putty around the inside of the flange’s drain opening. This creates a watertight seal between the flange and the waste pipe.
06. Attach Flange Bolts:
Insert flange bolts into the slots on the toilet flange, pointing upward. These bolts will secure the toilet to the flange.
07. Lay the Flooring:
Now that the toilet flange is securely installed, you can proceed with laying your flooring material. Be sure to cut the flooring material to fit around the flange without obstructing it.
08. Install the Toilet:
After the flooring is in place, it’s time to install the toilet. Place a wax ring over the flange, ensuring that it covers the flange’s opening completely. Carefully lower the toilet onto the wax ring, aligning the mounting holes with the flange bolts. Press down firmly to compress the wax ring and create a watertight seal.
09. Secure the Toilet:
Install nuts and washers onto the flange bolts and tighten them evenly with an adjustable wrench. Be careful not to overtighten, as this can damage the toilet or the flange.
10. Connect Water Supply:
Finally, reconnect the water supply line to the toilet tank and turn on the water. Check for leaks around the base of the toilet and make any necessary adjustments.
By following these steps, you can successfully install a toilet flange before laying flooring, ensuring a secure and watertight connection for your toilet while maintaining a polished appearance in your bathroom.
Advantages of Install Toilet Flange Before Flooring:
01.. Precise alignment: Installing the toilet flange before the flooring allows for precise positioning. By placing the flange at the correct height and alignment with the finished floor, you ensure a level surface for the toilet to sit on.
02.. Seamless flooring installation: With the flange in place, the flooring can laid right up to the edge of the flange, providing a clean and seamless appearance.
03.. Stability and support: By securing the flange directly to the subfloor, it offers a stable foundation for the toilet, reducing the risk of wobbling or rocking.
Disadvantages of Install Toilet Flange Before Flooring:
1. Potential damage: If the flooring material requires cutting or fitting around the flange, there is a possibility of damaging the flooring during installation.
2. Limited flexibility: Once the flange is install it becomes challenging to make adjustments to the toilet position without potentially compromising the flooring.
2. Installing the Toilet Flange After Flooring:
Installing a toilet flange after flooring has been laid can be a bit more challenging than installing it before, but it’s still possible. Here’s a step-by-step guide on how to install a toilet flange after the flooring is in place:
Materials and Tools Needed:
- Toilet flange with long tailpiece (extender kit)
- Wax ring
- Flange bolts
- Adjustable wrench
- Screwdriver
- Measuring tape
- Hacksaw or reciprocating saw (if needed)
- Drill with appropriate bits (if needed)
Install Steps Toilet Flange After Flooring:
01. Prepare the Area:
Start by removing the old toilet and thoroughly cleaning the area where the new flange will be installed. Make sure the subfloor is level and free of any debris.
02. Determine Flange Placement:
Measure the rough-in distance, which is the distance from the wall to the center of the drain pipe. Mark the location on the finished flooring where you want the center of the flange to be.
03. Choose the Flange Type:
For an installation after flooring, you’ll need a toilet flange with a long tailpiece or an extender kit. This tailpiece should be long enough to reach the top of your finished flooring.
04. Cut the Waste Pipe (if needed):
If the existing waste pipe is too high and doesn’t allow the flange to sit flush with or slightly above the finished floor, you may need to cut it down to the appropriate level using a hacksaw or reciprocating saw. Be sure to make a clean, straight cut.
05. Install the Extender Kit:
Attach the extender kit to the existing waste pipe, ensuring that it is securely fastened. Follow the manufacturer’s instructions for the specific extender kit you’re using.
06. Install the Flange:
Slide the flange onto the extender kit’s tailpiece, making sure it is level and properly aligned with your reference marks on the finished flooring.
07. Seal the Flange:
Apply a generous bead of silicone caulk or plumber’s putty around the inside of the flange’s drain opening. This creates a watertight seal between the flange and the waste pipe.
08. Attach Flange Bolts:
Insert flange bolts into the slots on the toilet flange, pointing upward. These bolts will secure the toilet to the flange.
09. Lay the Wax Ring:
Place a wax ring over the flange, ensuring that it covers the flange’s opening completely.
10. Install the Toilet:
Carefully lower the toilet onto the wax ring, aligning the mounting holes with the flange bolts. Press down firmly to compress the wax ring and create a watertight seal.
11. Secure the Toilet:
Install nuts and washers onto the flange bolts and tighten them evenly with an adjustable wrench. Be careful not to overtighten, as this can damage the toilet or the flange.
12. Connect Water Supply:
Reconnect the water supply line to the toilet tank and turn on the water. Check for leaks around the base of the toilet and make any necessary adjustments.
Installing a toilet flange after flooring requires careful measurement and proper alignment to ensure a secure and watertight connection. With the right tools and attention to detail, you can successfully complete the installation.
Advantages of Install Toilet Flange After Flooring:
1. Protection of flooring: By installing the flooring first, it remains protected from any potential damage during the toilet flange installation process.
2. Easier flooring installation: Installing the flooring without the presence of a flange allows for simpler and more straightforward installation, without having to work around or cut the flooring material.
3. Flexibility for future adjustments: With the flange installed after the flooring, it becomes easier to make small adjustments to the toilet’s position if needed without affecting the flooring.
Disadvantages of Install Toilet Flange After Flooring:
1. Potential for misalignment: Installing the flange after the flooring may result in a misaligned or uneven toilet base, leading to instability or leaks.
2. Difficulty in sealing: Properly sealing the flange to the flooring becomes more challenging when the flooring is already in place.
Also Read: Do You Really Need to Glue Your Toilet Flange?
Debating The Benefits And Limitations Of Installing Toilet Flange After Flooring
Installing toilet flange after flooring has its pros and cons. The precision it affords in properly aligning and placing the flange results in a seamless toilet-to-floor transition.
This method is also suitable for flooring repair or replacement projects. However, it may require additional work for flange height adjustments, risking damaging the flooring are among its cons.
Adoption of this method, while more time-consuming and labor-intensive, depends on various factors such as personal preference, skill level, and available resources.
Ultimately, weighing all options and consulting with a professional before making a decision is key to ensuring a successful and safe installation.
Do you install flooring or toilet first?
When it comes to home renovations or new construction, the general rule of thumb is to install the flooring before the toilet. Installing the flooring first allows you to achieve a clean and seamless look in your bathroom.
This way, the flooring can extend underneath the toilet, providing a polished appearance and making it easier to clean around the toilet’s base. It also ensures that the toilet sits level and stable on the finished floor.
However, there can be exceptions. In some cases, if you are replacing a toilet in an existing bathroom with flooring already in place, you may choose to install the toilet first and then fit the flooring around it.
Nevertheless, in most scenarios, installing the flooring prior to the toilet installation is the preferred and more practical approach for achieving an aesthetically pleasing and functional bathroom.
Considerations Before Making A Decision
Before deciding when to install a toilet flange, some important considerations need to taken into account. The type of flooring used should consider as some require the flange be install beforehand. Additionally, the condition of the bathroom subfloor is important to ensure a secure installation.
Space limitations and plumbing configuration should factore in, as they may affect the installation process. Finally, personal preference and project goals may influence the decision. It is important to carefully weigh all these factors to make an informed choice that will ensure a successful and long-lasting installation.
Frequently Asked Questions Of Should Toilet Flange Be Installed Before Or After Flooring?
What Is A Toilet Flange?
A toilet flange is a plumbing fitting that attaches toilets to drainpipes and seals them.
Should Toilet Flange Be Installed Before Or After Flooring?
It is preferable to install the toilet flange before the flooring to ensure a level and stable installation.
Can The Toilet Flange Be Installed On Top Of Flooring?
It is not recommend to install a toilet flange on top of flooring as it can lead to an uneven and unstable toilet installation.
What Problems Can Arise From Improper Installation Of A Toilet Flange?
Improper installation of a toilet flange can cause leaks, bad odors, and damage to the bathroom floors.
What if the toilet flange is not level with the floor?
If the toilet flange is not level with the floor, it can cause instability and potential leaks. To fix this, you can use flange spacers or shims to raise the flange to the desired level. Alternatively, consider using a flange extension kit if the flange is too low. It’s crucial to ensure the flange is at the correct height for a proper toilet installation.
How do I install a toilet flange on a concrete floor?
To install a toilet flange on a concrete floor, you’ll need a masonry drill and concrete anchors. First, mark the desired flange location on the floor, then drill holes for the anchors. Secure the flange to the concrete using the anchors and ensure it’s level. Follow with wax ring and toilet installation as usual.
How to install a toilet flange in new construction?
Installing a toilet flange in new construction is relatively straightforward. First, ensure the waste pipe is at the correct height and location. Next, attach the flange to the waste pipe using screws or bolts, making sure it’s level with the finished floor. Finish by sealing around the flange with silicone caulk or plumber’s putty before installing the toilet.
Can I install a toilet flange on plywood flooring?
Yes, you can install a toilet flange on plywood flooring. Make sure the plywood is in good condition and securely fastened to the subfloor. The process is similar to installing on other types of flooring. Position the flange at the correct height, attach it to the plywood with screws, and create a watertight seal with caulk or putty before installing the toilet.
What Is The Best Material For A Toilet Flange?
A toilet flange of pvc or abs material is consider the best option due to its durability and resistance to corrosion.
Conclusion
Installing a toilet flange before or after flooring depends on the situation at hand. If the floor has not been it’s best to install the flange before installing the flooring to ensure a watertight seal and prevent leaks. On the other hand, if the flooring has already been installing the flange after the fact might be necessary to achieve the correct height and secure the flange properly.
Ultimately, it’s important to conduct thorough research and consult with professionals to determine the best installation method for your unique situation. Taking the time to properly install a toilet flange can save significant time and money in the long run by preventing costly water damage and repairs.
Remember, the flange is a crucial component of a properly functioning toilet, so don’t cut corners when it comes to installation.
