Every homeowner should learn basic fixes for the bathroom appliance in order to maintain an efficient and clean home! Today, we’ll be tackling How to Raise Water Level in Toilet Bowl so that it never goes down too low again- thanks for joining us on this journey towards better plumbing skills around here!
Your bathroom appliance has an important role in making sure homes stay clean and running smoothly- from removing waste material down through flushing away germs that may be lurking about the place at any given.
A high or low water level in your toilet may not seem like a big deal, but with time it can cause problems. When you flush, it’s important that there is enough water in your toilet tank for optimal performance. When you don’t have enough to flush the tank then the flushing power may suffer, leading to troublesome blocks and clogs.
Fortunately, these are easy fixes that only take minutes! So, let’s begin with us, and do it yourself without wasting money to hire a plumber!
Why Adjust the Water Level?
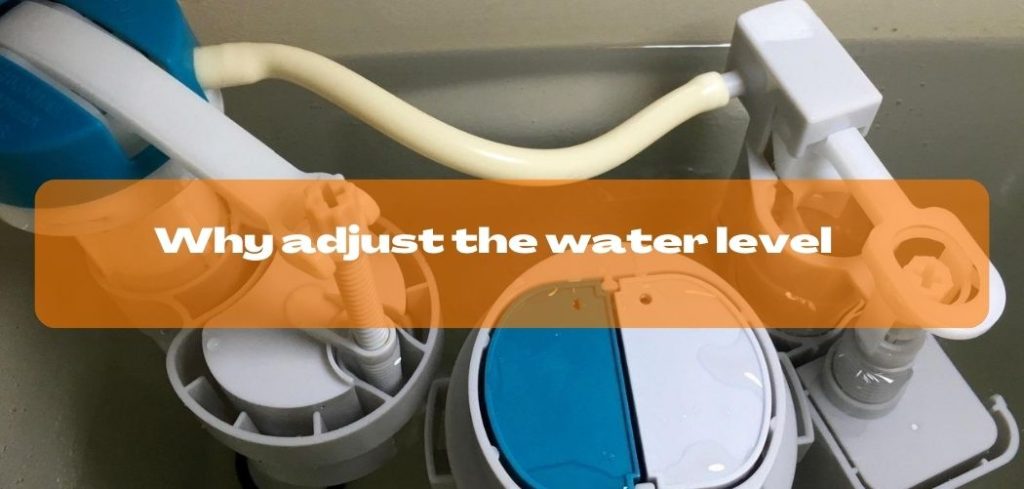
You might be surprised to learn that your toilet bowl’s water level is more important than you think. If it’s too low, there could not be enough to flush properly and end up with frequent clogs or even have their pipes flooded!
When it’s too high? Your running constantly will waste a lot of valuable resources in the long run because they’ll never get used again when flushed—and this can lead to safety hazards.
That’s why we would recommend checking often because one small change can have huge consequences on the long-term stability of your place – so don’t forget about maintaining clean fillings.
How to Raise Water Level in Toilet Bowl

The water level in your toilet is determined by a float that turns the supply on and off. This can be done by adjusting two types of floats one is Ball-and-Arm Float and the other is Cylinder Float, but before anything else, you must turn off the toilet’s water supply!
How to Turn Off the Water Supply to The Toilet?
here are three simple easy stapes by following these stapes you can turn off the toilet water supply easily!
1. Remove the toilet tank lid:
first, the tank lid safely set aside, you’ll now have access to the flushing mechanisms inside the tank. But take care not to drop the lid on anything that may cause damage. Tanks are typically made out of ceramic which means they’re quite fragile so be careful when handling them.
2. Take note of the water level inside the tank:
Your water level should be 1–2 inches (2.5–5 cm) below the fill valve and overflow tube in order for it to work correctly. If you notice that this isn’t happening, and it seems higher or lower than this level, your water level may be off-balance. If you notice a line in your toilet tank, either printed on or etched into porcelain that shows where the water level should be at all times.
3. Turn off the water supply to the toilet:
You should now be able to see and access the external water valve on your wall, behind and below where you found that pesky flush handle. Rotate it as far clockwise as possible with a pen-sized open-end wrench (or similar tool), then flush! Once everything is flushed clear away from this point for good measure. The tank will no longer refill itself automatically. that’s mean you can work inside the tank unobstructed!
Make sure you turn the handle until the water stops running. Do not attempt to adjust or repair any mechanisms inside of a toilet tank without first emptying it out. Otherwise, you will be obstructive for work inside the tank.
At this stage, you are done Turn Off the Water Supply to The Toilet! now it is time to Adjust a Ball-and-Arm Float. That’s what we are writing below So without wasting time let’s start to know about Ball-and-Arm Float!
1. Ball-and-Arm Float
A ball-and-arm float is a plastic ball shape connected to a metal arm. You can adjust it by taking the 4 steps below:
1. Examine the float and fill valve:
One of the first things you should do when looking at a toilet is to give it an inspection. Taking a look at your flushing mechanisms can help you figure out what needs repair. If you notice any obvious damage or defects that you might need to call a professional to repair it. if everything is ok then you can go to the next stage!
2. Examine the toilet tank’s float height:
If you want your toilet tank to work properly, check the float. A plastic ball is attached at top of the fill valve. The toilet’s float should be at the correct height because after it refills the height determines the water level in the tank.
If everything is ok there It should be at the water level. If the water level seems too high or low, adjust the height of the float to make it higher or lower. Then adjust it, and watch how that impacts your water level when refilling tanks!
If you think your water level is high or low, it may be the float. Check to see if the float moves when you shake it. If there is water inside of the float, call a plumber to replace it. Make sure that the float is connected to the fill valve so that it can move up and down.
3. Use a screwdriver to raise or lower the float height:
Next to the fill valve should be a screw that you can turn either clockwise or counterclockwise. Turning this single screw 1 full rotation will raise the water level and turning it in reverse lower yours accordingly
To adjust the float, simply turn it. If you have a rusted screw or one that is stuck in place and can’t be turned anymore then try unscrewing from its base first before applying screws-of-doom.
It should come off easily with minimal pressure applied; if not do what’s called for the next step: Remove any rust covering on threads by carefully cleaning them up using a wire brush so they don’t get clogged when putting new parts back together again!
4. Flush the toilet to test the water level:
Make sure the water in your toilet is turned back on and give it a minute or two to fill. Now flush, observe how much water remains after flushing. Ideally, the bowl should be about halfway full.
If there are still remnants from halfway full that can be seen without any trouble at all then congratulations! You have successfully completed this step easily enough (it might take less than 10 seconds).
Now at this stage, you have to Adjust a Cylinder Float. That’s what we are writing below So without wasting time let’s start to know about Cylinder Float!
2. Cylinder Float
This float, which looks like a cup with a central cylinder running through the center, is much easier to adjust. You can adjust it by taking the 7 steps below:
1. Identify the cylinder float:
Adjusting the water level in your toilet is easy with a fill valve that has an adjustable float. Some newer toilets have been engineered as solid cylinders fitted to the shaft of a fill valve, and these types can be adjusted with just water level in seconds.
Cylinder valves are a great option for individuals who might not be as experienced with home repairs. They’re easy to install and remove, which means you can perform maintenance on them yourself!
2. Lift off the toilet tank lid:
Once you’ve opened the lid from the tank, leave it in a safe place there can’t be anyway harm to it. Because most toilet lids are made of ceramic that can break easily. So, Be careful when you are working your hand can’t touch the lid.
After removing the toilet lid, you have to check that the water level is below 1–2 inches (2.5–5 cm) or near your fill valve and overflow tube. then you might need adjustments.
3. Turn off the water supply before you work on the float:
In order to locate the external water valve on your wall, you need to look behind and below where ever is installed. The valves are usually found in this area near toilets or other plumbing fixtures like showers. Rotate the knob clockwise as far up on it goes. When you can’t go any farther, flush and continue flushing until your tank is empty to avoid overfilling!
4. Locate the adjustment stem on the side of the float:
The adjustment stem is a long, slender tube that connects the larger fill valve. In most models, it will either run parallel with or extend horizontally out from your favorite bottle’s top. The extra length provides increased leverage and control when making adjustments so you can easily adjust how much water goes into each tank!
Before making any drastic changes, familiarize yourself with the mechanisms inside your toilet tank. Refer to an instruction manual or manufacturer’s website if available for more information about how it works!
5. Check for a release clip on the float:
Some cylinder floats can be positioned by squeezing a release clip on the float itself and raising or lowering it to the desired height. If you’re looking for an easy way to keep your toilet tank water level steady, then a release clip on the float is one of the best methods around!
The release clip on your float can be a useful tool when adjusting the height of the water. If not, you will need to locate and turn an adjustment dial.
6. Raise or lower the float 1⁄2 inch (1.3 cm):
To adjust the height of a floating toilet, use two fingers to grasp the notched dial on its stem. Rotate it clockwise or counterclockwise until you find an appropriate setting for your needs.
Once it’s at a suitable level for use (low enough so that water barely flows over top), replace the lid and turn the shutoff valve back on again!
If you’re having trouble turning the adjustment stem, check for a screwdriver notch. Some toilets have screws and are secured by them to ensure that they don’t get knocked off while in use.
Do not turn more than 1 full rotation at once! Turn slowly so as not too quickly adjust your water level without warning and then flush away some of those extra calories with wasted energy when things go wrong.
7. Test the toilet level height after you have turned the water valve on:
When the tank is full, you should be able to flush a few times and not have any problem. If water spills out before flushing or if there are low levels when finished then adjust your float accordingly until reaching the desired height
If the level is still off after several adjustments, then call a plumber. A professional will come out and fix it for you!
If the water level in the bowl has the right place congratulations! You have successfully completed this step easily enough.
Concussion: How to Raise Water Level in Toilet Bowl?
Adjusting the high or low water in the tank is not a difficult project that you should put off. we are talking about it in this article How to Raise Water Level in Toilet Bowl? read it properly as soon as possible to avoid the situation deteriorating. It should take you around an hour to complete.
One of the most important things to remember when installing a new valve is that you have to put it back together in order. Make sure everything goes back where they go and don’t forget about any small parts, or else leaks could occur!
You should never forget the importance of water levels. Make sure you have enough so that it’s one or half-inch under your overflow pipe!