The toilet fill valve is a critical component of a toilet that controls the water flow into the tank, allowing it to fill after each flush.
Over time, the fill valve may need adjustment to ensure the toilet is filling to the appropriate level and avoiding water waste or noisy refilling. Adjusting the toilet fill valve is a simple and cost-effective DIY fix that can be done with basic tools and minimal expertise.
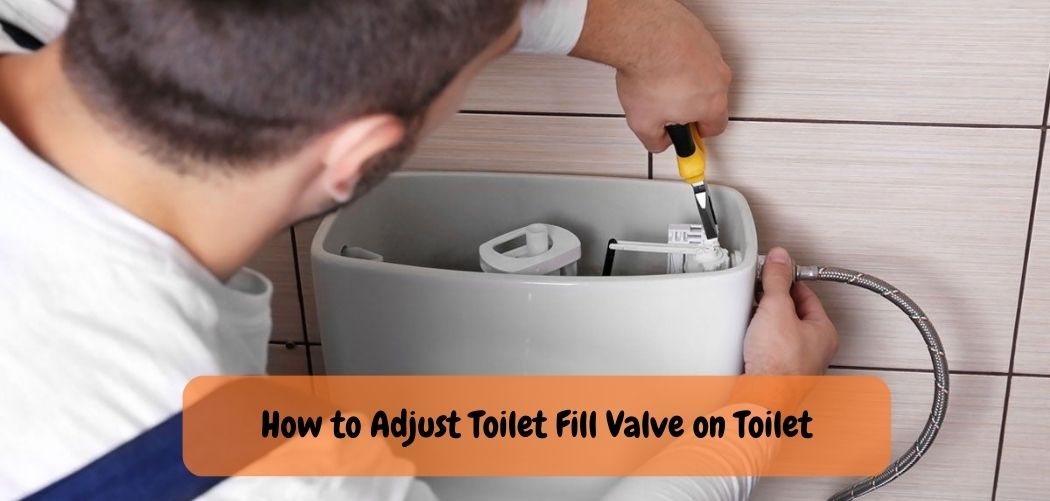
In this guide, we will provide step-by-step instructions on how to adjust the toilet fill valve on your toilet, helping you troubleshoot common issues and optimize the performance of your toilet.
By making the necessary adjustments to the toilet fill valve, you can ensure efficient water usage, reduce potential water damage, and maintain a properly functioning toilet.
Toilet Fill Valve Adjustment Guide
In this comprehensive guide, we will provide step-by-step instructions on how to adjust the toilet fill valve on your toilet, helping you troubleshoot common problems and optimize the performance of your toilet.
Tools and Materials Needed:
- Adjustable wrench
- Screwdriver (flathead or Phillips)
- Towel or rag
- Replacement fill valve (if necessary)
Step 1: Turn Off the Water Supply
Before making any adjustments to the toilet fill valve, it’s essential to shut off the water supply to the toilet. Locate the water shut-off valve, usually located on the wall or floor near the base of the toilet, and turn it clockwise to close it. Flush the toilet to drain the water from the tank and remove as much water as possible using a towel or rag.
Step 2: Identify the Type of Fill Valve
Toilet fill valves come in different designs, and the adjustment method may vary depending on the type of fill valve installed in your toilet. The most common types of fill valves are the float cup fill valve and the floatless fill valve. It’s important to identify the type of fill valve in your toilet before proceeding with adjustments.
- Float Cup Fill Valve: This type of fill valve has a float attached to a rod that is connected to the fill valve assembly. The float is a hollow plastic or metal ball that rises with the water level in the tank, and the fill valve shuts off when the float reaches the desired level.
- Floatless Fill Valve: Also known as a pressure-assisted fill valve, this type of fill valve uses water pressure to control the water flow. It doesn’t have a traditional float or ball, and the water pressure inside the toilet tank determines when the fill valve shuts off.
Step 3: Adjusting a Float Cup Fill Valve
If your toilet has a float cup fill valve, follow these steps to adjust it:
1.Locate the adjustment rod or screw attached to the float cup. This is usually on the top of the fill valve assembly.
2. If the water level in the toilet tank is too high, adjust the rod or screw to lower the float cup, which will lower the water level. If the water level is too low, adjust the rod or screw to raise the float cup, which will raise the water level.
3. Make small adjustments and check the water level in the tank after each adjustment. The ideal water level should be about 1 inch below the top of the overflow tube.
4. Once you’ve achieved the desired water level, turn on the water supply and let the tank fill. Check for any leaks around the fill valve and ensure that the fill valve shuts off when the water reaches the desired level.
Step 4: Adjusting a Floatless Fill Valve
If your toilet has a floatless fill valve, follow these steps to adjust it:
1. Locate the adjustment screw on the fill valve assembly. This screw controls the pressure of the fill valve and determines when it shuts off.
2. If the water level in the toilet tank is too high, turn the adjustment screw clockwise to decrease the pressure and lower the water level. If the water level is too low, turn the adjustment screw counterclockwise to increase the pressure and raise the water level.
3. Make small adjustments and check the water level in the tank after each adjustment. The ideal water level should be about 1 inch below the top of the overflow tube.
4. Once you’ve achieved the desired water level, turn on the water supply and let the tank fill. Check for any leaks around the fill valve and ensure that the fill valve shuts off when the water reaches the desired level.
Step 5: Test and Fine
Test After making adjustments to the toilet fill valve, it’s important to test the toilet’s performance and fine-tune as needed. Flush the toilet and observe the water level in the tank as it refills.
The water should stop filling when it reaches the desired level, which should be about 1 inch below the top of the overflow tube.
If the water level is too high or too low, you may need to make further adjustments using the methods outlined in Step 3 or Step 4.
Step 6: Replace Fill Valve (if necessary)
If you’re still experiencing issues with the toilet fill valve even after making adjustments, it may be time to replace the fill valve. Fill valves can wear out over time or become damaged, resulting in inefficient or inconsistent filling.
To replace a fill valve, you’ll need to first shut off the water supply, drain the tank, and disconnect the water supply line from the fill valve. Then, follow the manufacturer’s instructions to install a new fill valve, making sure to adjust it to the appropriate water level as discussed in Steps 3 or 4.
Step 7: Clean and Maintain
Regular cleaning and maintenance can help prolong the lifespan and performance of your toilet fill valve. Periodically inspect the fill valve for any debris or sediment buildup that may affect its function. If necessary, clean the fill valve and surrounding area to ensure proper operation.
Additionally, keep an eye out for any signs of leaks or water waste and address them promptly to prevent further issues.
Are Toilet Fill Valves Adjustable?

Most toilet fill valves are adjustable to some degree, allowing you to control the amount of water that flows into the bowl with each flush.
To adjust your fill valve, first locate the adjustment screw or knob on the side of the valve. Then, simply turn the screw or knob in either direction to increase or decrease the flow of water. If your fill valve does not have an adjustment screw or knob, it is likely not adjustable.
How Do I Adjust My Fill Valve Speed?
You may need to adjust the speed of your fill valve if you notice your toilet is not filling up as quickly as it used to. There are a few things that could be causing this issue, but the most likely culprit is a slow fill valve.
There are two ways to adjust the speed of your fill valve: by adjusting the water pressure at the main shut-off valve or by adjusting the screw on the top of the fill valve itself.
If you have a slow filling toilet, we recommend starting with the latter option first.
To adjust the screw on the top of the fill valve, start by turning it clockwise to increase the speed of water flow and counterclockwise to decrease it. If you turn it too far in either direction, though, you risk damaging the Fill Valve so be sure to exercise caution while making adjustments.
Once you’ve found just the right setting, flush your toilet and check for proper function – if all goes well, problem solved!
How to Fix a Toilet – Diagnostics – Internal Leaking
Conclusion
Adjusting the toilet fill valve is a straightforward process that can greatly improve the performance of your toilet. By following the steps outlined in this guide. you can troubleshoot and fix common issues such as water waste, noise, or improper filling levels.
Regularly adjusting the toilet fill valve can help you save water, reduce your water bill, and prevent potential water damage. Remember to always exercise caution when working with plumbing components. And if you’re unsure about any step, it’s best to consult a professional plumber.
With the knowledge gained from this guide, you can confidently adjust the toilet fill valve on your toilet and ensure that it continues to function efficiently for years to come. Enjoy a properly functioning toilet that conserves water and operates smoothly!