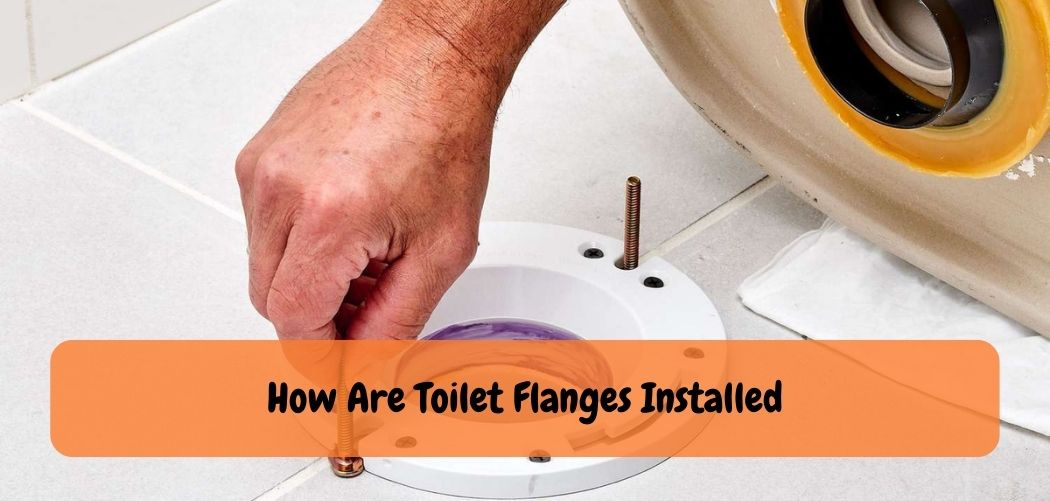
To install a toilet flange, you need to first remove the existing wax ring and old flange, clean the area, and then attach the new flange securely to the floor. This can be done by drilling pilot holes and screwing the flange in place, using concrete screws or adhesive to secure it to the subfloor or concrete.
Installing a toilet flange is a critical step in the construction or renovation of a bathroom. A toilet flange serves as the connection point between the toilet and the waste pipe, providing stability, preventing leaks, and ensuring efficient waste disposal.
While the task of installing a toilet flange may seem daunting, it is a manageable process that can be accomplished with the right tools and a basic understanding of plumbing techniques. In this article, we will explore the step-by-step process of installing a toilet flange.
Cvering the necessary preparations, tools required, and the techniques involved. Whether you are a DIY enthusiast looking to tackle a bathroom project or a homeowner seeking a better understanding of the installation process, this guide will provide you with valuable insights to help you successfully install a toilet flange like a professional.
The Smart Guide: How Are Toilet Flanges Installed
Installing a toilet flange is a crucial step in setting up a functional and leak-free toilet system. A toilet flange provides a secure connection between the toilet and the waste pipe, ensuring stability and preventing any potential plumbing issues.
If you’re embarking on a bathroom renovation or need to replace an existing flange, this guide will take you through the step-by-step process of installing a toilet flange. By following these instructions and using the right tools, you can successfully complete the installation and have a properly functioning toilet.
Before You Begin:
Before you start the installation process, make sure you have the necessary tools and materials on hand. Here’s what you’ll need:
1. Toilet flange: Select a flange that matches the size of your waste pipe (usually 3 or 4 inches) and is compatible with your toilet model.
2. Wax ring: This ring creates a watertight seal between the toilet flange and the toilet base. Choose a wax ring that fits your toilet and is appropriate for your plumbing setup.
3. Adjustable wrench or pliers: These tools will help you tighten the bolts and nuts during the installation process.
4. Screwdriver: You may need a screwdriver to remove the existing flange or to secure the toilet to the flange.
5. Closet bolts and nuts: These bolts hold the toilet in place on top of the flange. Ensure they are the correct size for your toilet and flange.
6. Level: Use a level to ensure the toilet is installed properly and sits evenly on the floor.
Step-by-Step Installation Process:
1. Prepare the area: Shut off the water supply to the toilet and remove the old toilet if necessary. Clear the area around the flange, ensuring it is clean and free from debris.
2. Remove the old flange (if applicable): If you’re replacing an existing flange, use a screwdriver to remove the screws or bolts securing it to the floor. Lift the old flange off the waste pipe and discard it.
3. Position the new flange: Place the new flange over the waste pipe, aligning it with the mounting holes on the floor. Ensure the flange is level and centered over the waste pipe.
4. Secure the flange: Insert the closet bolts into the flange’s mounting holes, pointing upward. Use nuts and washers to secure the bolts in place. Tighten the nuts until the flange is firmly secured to the floor.
5. Install the wax ring: Place the wax ring onto the flange, ensuring it is centered and positioned correctly. The wax ring will create a watertight seal between the flange and the toilet base.
6. Install the toilet: Carefully lower the toilet bowl onto the flange and align it with the closet bolts. Apply even pressure to compress the wax ring and create a seal. Ensure the toilet is level by using a level tool.
7. Secure the toilet: Install washers and nuts onto the closet bolts, tightening them with an adjustable wrench or pliers. Be careful not to overtighten, as it may crack the toilet base.
8. Connect the water supply: Reconnect the water supply line to the toilet tank and turn on the water. Check for any leaks around the base of the toilet and tighten the nuts if necessary.
9. Test the toilet: Flush the toilet a few times to ensure it functions properly and there are no leaks or wobbling. Make any adjustments if needed.
Also Raed: Do You Really Need to Glue Your Toilet Flange?
Frequently Asked Questions On How Are Toilet Flanges Installed?
How Do You Remove An Old Toilet Flange?
To remove the old flange, unscrew and remove any bolts, then carefully pry the old flange from the floor.
How Do You Install A New Toilet Flange?
Clean the area around the drain and install the new flange, using screws and adhesive if necessary.
What Tools Are Needed To Install A Toilet Flange?
You will need a wrench, screwdriver, putty knife, hacksaw, drill, and possibly a hammer and chisel.
Can You Install A Toilet Flange Without A Plumber?
Yes, as long as you have the necessary tools and understand the procedure, you can install a toilet flange yourself.
How Do You Know If You Need To Replace Your Toilet Flange?
If your toilet wobbles or moves when you sit on it, or if you notice any water leaking around the base, it may be time to replace the flange.
Conclusion
Toilet flanges are a crucial aspect of the plumbing system, and their proper installation is essential. As we have seen, the process of installing a toilet flange involves several steps, including removing the old flange, placing the new one, and securing the bolts.
It’s important to ensure that the flange is level and properly sealed to avoid leaks or unstable toilet base. With the right tools, materials, and guidance, installing a toilet flange can be a simple diy job that can save you from unnecessary expenses.
Remember, a well-functioning toilet is integral to maintaining home hygiene, and installing a strong and level flange is key to ensuring its optimal performance. So, tackle your next bathroom project with confidence, and enjoy a leak-free and sturdy toilet!


