How to Replace Kohler Toilet Seat With Hidden Bolts?
Welcome to the step-by-step guide on how to replace a Kohler toilet seat with hidden bolts! Kohler is a renowned brand known for its quality and durability in the bathroom fixture industry. Over time, toilet seats may need to be replaced due to wear and tear, or simply for an aesthetic update.
However, replacing a Kohler toilet seat with hidden bolts may seem daunting if you’re not familiar with the process. But fear not! In this guide, we will walk you through the steps to successfully replace your Kohler toilet seat with hidden bolts, ensuring a seamless and hassle-free installation.
So, let’s dive in and learn how to give your bathroom a fresh new look by replacing your Kohler toilet seat with hidden bolts!
Kohler Toilet Seat With Hidden Bolts Replace Guide
Kohler is a reputable brand known for its innovative bathroom fixtures, and replacing a toilet seat with hidden bolts can give your bathroom a sleek and modern look. Here’s a step-by-step guide on how to replace your Kohler toilet seat with hidden bolts.
Step 1: Gather the necessary tools and materials
Before you begin, make sure you have the following tools and materials ready:
- Replacement Kohler toilet seat with hidden bolts
- Screwdriver (flathead or Phillips, depending on your toilet)
- Adjustable wrench or pliers
- Towel or rag
- Penetrating oil (if bolts are rusted or stuck)
- Optional: rubber gloves for grip and protection
Step 2: Remove the old toilet seat
To remove the old toilet seat, follow these steps:
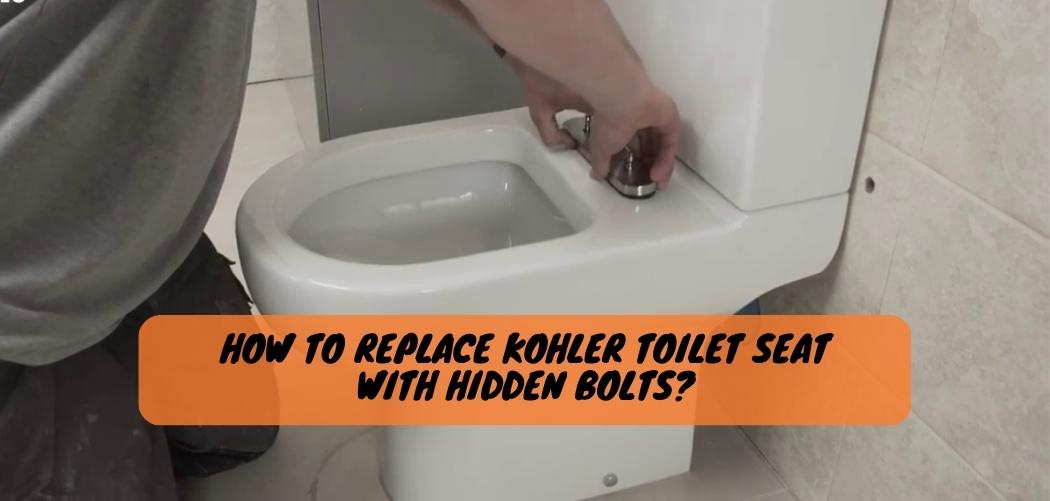
1. Locate the hinge caps:
Look for two plastic caps covering the bolts at the back of the toilet seat. These caps are usually located near the toilet tank and may have the Kohler logo or “H” and “C” markings for hot and cold.
2. Pry off the hinge caps:
Use a screwdriver or your fingers to gently pry off the hinge caps and reveal the bolts underneath.
3. Loosen and remove the nuts:
Use a screwdriver, adjustable wrench, or pliers to loosen and remove the nuts securing the bolts. If the nuts are rusted or stuck, you may need to use penetrating oil and let it sit for a few minutes before attempting to loosen them.
4. Lift off the old toilet seat:
Once the nuts are removed, lift the old toilet seat and carefully set it aside. Be sure to hold onto the bolts as they may fall into the toilet bowl.
Step 3: Install the new toilet seat
With the old toilet seat removed, you’re now ready to install the new Kohler toilet seat with hidden bolts. Follow these steps:
1. Align the new toilet seat:
Place the new toilet seat onto the toilet bowl, aligning the bolt holes with the holes on the toilet bowl.
2. Insert the bolts:
Insert the bolts through the holes on the toilet bowl from the top, ensuring they are snug and secure.
3. Tighten the nuts:
From underneath the toilet bowl, use a screwdriver, adjustable wrench, or pliers to tighten the nuts onto the bolts. Be careful not to overtighten as it may cause damage to the toilet bowl.
4. Attach the hinge caps:
Once the nuts are tightened, snap the hinge caps back into place, covering the bolts for a clean and seamless appearance.
Step 4: Test and adjust After installing the new toilet seat
It’s important to test its stability and make any necessary adjustments. Here’s what you should do:
1 .Sit on the toilet seat: Sit on the new toilet seat to ensure it’s securely attached and doesn’t wobble or shift.
2. Adjust if needed: If the toilet seat feels loose, you may need to adjust the nuts slightly to achieve a snug fit. Use your screwdriver, adjustable wrench, or pliers to tighten or loosen the nuts as needed until the toilet seat is stable.
Step 5: Clean and tidy up
Finally, don’t forget to clean up and tidy the area around the toilet. Wipe down the toilet bowl, seat, and surrounding area with a towel or rag to remove any debris or residue from the installation process. This will leave your bathroom looking fresh and clean.
And there you have it! With these simple steps, you can successfully replace your Kohler toilet seat with hidden bolts and give your bathroom a stylish and updated look. Just remember to always refer to the manufacturer's instructions and take necessary.
How Do You Tighten a Hidden Toilet Bolt?

If your toilet has a hidden bolt, it may be difficult to know how to tighten it. The first thing you need to do is remove the lid from the tank. Once the lid is off, you should see a small hole in the back of the tank.
This is where the hidden bolt is located. To tighten the hidden bolt, you will need a wrench. Insert the wrench into the hole and turn it clockwise until tight.
You may need to use some force to get it tight enough. Once it is tight, replace the lid on the tank and test out your toilet to make sure everything is working properly.
Removing Kohler Toilet Seat Bolts
Conclusion
Replacing a Kohler toilet seat with hidden bolts is a relatively straightforward process that can easily accomplish with the right tools and steps.
By following the instructions provided in this guide, you can confidently upgrade your bathroom with a new Kohler toilet seat and enjoy its durability and functionality. Remember to always refer to the manufacturer’s instructions and take necessary safety precautions when working with toilet fixtures.
With a little patience and careful execution, you’ll be able to replace your Kohler toilet seat with hidden bolts and enjoy a refreshed bathroom appearance. If you have any questions or encounter any challenges along the way, it’s always best to seek professional assistance. Happy DIY-ing!