How to Install a Fluidmaster Toilet Fill Valve? know the Smart Way!
Toilet fill valves play a crucial role in the functioning of your toilet. They control the water flow into the tank and ensure that it refills properly after each flush. A faulty or worn-out fill valve can cause water waste, noise, and even leaks. Installing a new fill valve, such as the popular Fluidmaster brand, can improve your toilet’s efficiency and prevent future issues. In this article, we will guide you through the steps to properly install a Fluidmaster toilet fill valve, including preparation, removal of the old valve, installation of the new valve, and testing. With the right tools and knowledge, you can easily replace your old fill valve and restore your toilet’s performance.
Fluidmaster Toilet Fill Valve Installation Prosses
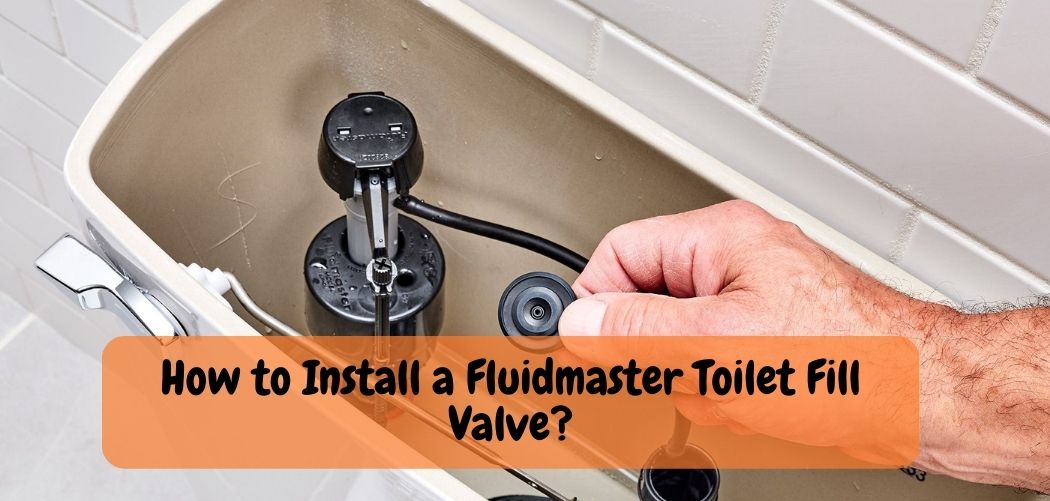
If your toilet is constantly running or filling up slowly, you may need to replace the fill valve. The Fluidmaster 400A Universal Toilet Fill Valve is a great option and relatively easy to install. Here’s what you’ll need to do:
1. Turn off the water supply to your toilet and flush the tank to empty it.

![]()
2. Remove the old fill valve by unscrewing it from the tank.
3. Clean the threads on the tank opening with a wire brush to ensure a tight seal.
4. Screw in the new fill valve using Teflon tape on the threads (be sure not to overtighten).
5. Attach the new rubber washer and nut to secure the valve in place. Be sure not to overtighten these as well.
Fluidmaster Fill Valve Adjustment
The Fluidmaster 400A Universal Toilet Fill Valve is one of the most popular fill valves on the market. It’s easy to install and adjust, and it’s compatible with most toilets. If you need to adjust the height of your fill valve, here’s how to do it:
First, turn off the water supply to your toilet. Then, flush the toilet to empty the tank. Next, remove the cap from the top of the fill valve.
Use a flathead screwdriver to turn the adjusting nut clockwise or counterclockwise until the water level in the tank is where you want it.
Keep in mind that you may need to experiment a bit to get the perfect setting. And if your toilet has a float ball, you’ll need to adjust that as well.
But once you’ve got everything dialed in, you should be good to go!
Fluidmaster 400 Model Installation
![]()
If you’re looking to install a Fluidmaster 400 model, there are a few things you need to know. Here’s a quick guide to help you through the process.
Before starting, make sure you have all the necessary tools and materials.
You’ll need a Phillips head screwdriver, a putty knife, pliers, and Teflon tape. You should also gather up some rags or old towels to clean up any messes.
Once you have everything ready, begin by shutting off the water supply to your toilet.
Next, flush the toilet to empty out the tank. Now would be a good time to clean the area around the valve before proceeding with installation.
Remove the old valve using your Phillips head screwdriver.
Be careful not to damage the surrounding area as you do this. Once the old valve is out, use your putty knife to remove any old putty or debris from around the opening. This will ensure that your new valve seals properly.
Now it’s time to install your new Fluidmaster 400 model valve! Start by wrapping some Teflon tape around the threads of the inlet pipe (this is where water enters the tank). Screw on your new valve until it’s tight – but be careful not to over-tighten as this could damage both the valve and pipe.
Finally, turn on your water supply and check for leaks around valves and joints. If everything looks good, give yourself a pat on the back – you’ve just successfully installed your new Fluidmaster 400 model!
Fluidmaster 400A Fill Valve
The Fluidmaster 400A Fill Valve is a great addition to any toilet. This valve is designed to automatically shut off the water supply to your toilet when the tank is full, preventing overflows and wasted water. The 400A Fill Valve is easy to install and comes with everything you need for a quick and easy installation.
Fluidmaster 400 Model Anti-Siphon
![]()
If you have a leaky toilet, it may be time to replace the Fluidmaster 400 Model Anti-Siphon. This is a relatively easy repair that anyone can do. Simply turn off the water supply to the toilet, flush the toilet to empty the tank and remove the old valve.
Be sure to take note of how the old valve was installed so you can install the new one in the same way.
The Fluidmaster 400 Model Anti-Siphon comes with everything you need for installation including a new valve, gasket and bolts. Installation instructions are included with the kit.
Once installed, simply turn on the water supply and test for leaks. If all is well, your leaky toilet should be fixed!
Fluidmaster 400 Model Anti Siphon Keeps Running
![]()
If your Fluidmaster 400 model anti siphon valve keeps running, there are a few things you can check to see what the problem might be. First, make sure that the water supply to the valve is turned on all the way. If it is, then check to see if the float arm is stuck in the open position.
To do this, simply lift up on the float arm and see if it moves freely. If it doesn’t move freely, then you will need to replace the float arm assembly.
How to Install Fluidmaster 400A Toilet Fill Valve?
![]()
If you have a running toilet, it may be time to replace the fill valve. The Fluidmaster 400A is a universal fit fill valve that will work with most toilets. Follow these steps to install the Fluidmaster 400A:
1. Turn off the water to your toilet at the shutoff valve. This is usually located behind the toilet or under the sink.
2. Flush the toilet to empty the tank and bowl.
3. Disconnect the supply line from the existing fill valve and remove the nut holding it in place. If your old fill valve has a mounting bracket, remove it as well by removing the screws that hold it in place.
4. Remove the old fill valve from the tank by unscrewing it from below. If necessary, use a pair of pliers to loosen it. Be careful not to damage or crack the porcelain around where it’s attached.
5 With everything disconnected, lift out your old fill valve assembly and take a look at how everything was installed originally so you can get an idea of how to put your new one together correctly It’s helpful to take a photo of this step for reference later if needed.
6. Install your new Fluidmaster 400A according to instructions that come in package .Be sure not overtighten any bolts or nuts during installation.
How Do You Replace the Flush Valve on a Fluidmaster Toilet?
If your Fluidmaster toilet is running constantly or leaking from the flush valve, it’s time to replace the flush valve. This is a relatively easy repair that you can do yourself in just a few minutes.
To start, turn off the water supply to the toilet.
Then, flush the toilet to empty the tank and remove as much water as possible. Next, unscrew the old flush valve from the bottom of the tank using a wrench. Be careful not to damage any of the other parts in the tank while you’re doing this.
Now it’s time to install the new flush valve. First, put some plumbers’ putty around the base of the new valve where it will sit against the bottom of the tank. Then screw it into place with your wrench, being careful not to over-tighten and damage it.
Finally, turn on your water supply and check for leaks around the base of your new flush valve. If everything looks good, give it a test run by flushing your toilet several times. You should now have a fully functioning Fluidmaster toilet!
What is the Most Common Problem Associated With the Fluidmaster?
![]()
If you have a Fluidmaster toilet fill valve, the most common problem you may encounter is that the fill valve sticks in the open position. This can be caused by dirt or debris build-up on the valve seat, which prevents it from sealing properly. If this happens, you’ll need to clean the valve seat and make sure it’s free of any obstructions before using it again.
Can I Replace a Toilet Fill Valve Myself?
If your toilet fill valve is leaking or not working properly, you may be able to replace it yourself. Toilet fill valves are relatively easy to replace, and most hardware stores sell replacement valves.
Before replacing the valve, make sure to turn off the water to the toilet.
There will usually be a shut-off valve near the base of the toilet. Once the water is turned off, flush the toilet to empty out any remaining water in the tank.
Then, remove the old valve by unscrewing it from the tank.
Be careful not to damage any of the parts as you remove it. Install the new valve in its place, making sure that all connections are tight. Turn on the water and check for leaks before using the toilet again.
How to install a Fluidmaster universal toilet fill valve.
Conclusion
If your toilet is constantly running or filling up slowly, you may need to replace the fill valve. The Fluidmaster 400A Universal Toilet Fill Valve is a great option and relatively easy to install.